Silicone mold tutorials

Silicone mold tutorials

Ever wondered how I turned some of my own creations into a silicone mold?

The process is actually very easy!


Not a fan of blogs? Check out my youtube!

Heres a quick list of supplies you need:

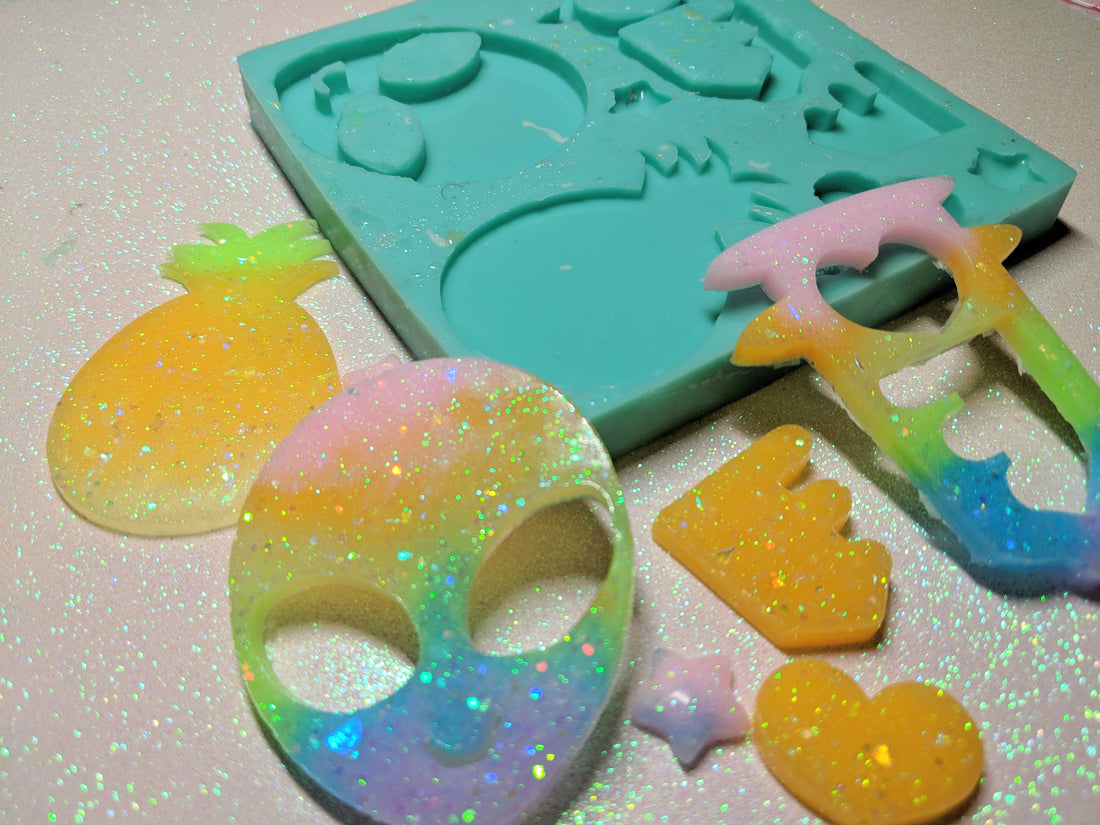
  • Something to mold (see below on what I molded)

  • Silicone Mold kit (I recommend Mold Star 15 SLOW Moldmaking Silicone Rubber)

  • Contact paper or clear plastic tape

  • Glue Gun & Glue Sticks

  • X-Large Cookie Cutter or something for the mold to cure in

  • Bowl to mix silicone in

  • Stir stick to mix with

  • Scissors

  • X-Acto knife

Optional:

  • Cookie Sheet

  • Refrigerator

Check out my shopping list on amazon:  vhttp://a.co/iXCZzdj

The first thing that I have to do is order in something to mold. Theres so many options when it comes to choosing something to mold. Some examples include 3D printing, molding something from clay, acrylic cut blanks, or even molding something already out there. Please keep in mind that you do not want to sell anything copywrited, or someone elses art (Its a big no-no in the community)! So I recommend using anything you order from China or even just Aliexpress in general.

Personally, I like to molds from custom acrylic blanks, this way I avoid making the same shapes as everyone out there while still having something big for resin. I also like using acrylic vs a 3D printer because I dont have to put an aditional layer of resin to ensure it is shiney! With 3D printing the texture isnt quite as smooth and even as a cut of acrylic, its also cheaper to order as well! 

You can find a couple of shops out there to get something cut (Yumelixir & Kitycrylics for example) but I prefer to order from the shop Yokai Candy. Not only are they good friends of mine, but they also have great products, and quick turn around time. Some of the other shops you have to wait on a waiting list, however I have not had to wait longer than 1-2 weeks for Yokai Candy to respond & ship something out!

Alrighty! Now that you have everything ready to mold now heres the real tutorial! Yaaaay!

1. I recommend laying all of your pieces out and finding the best layout for all of them.

2. Once all of your pieces are set you only need to keep them in place with eirther contact paper or clear packing tape. Both will work for this project. Keep in mind each has their plus' and minus'.  With the clear packing tape it creates such a nice bond with the pieces, however the end mold can create grooves or water marks. With the contact paper you get a nice, even, and flat top with your mold. However it is not as sticky as the paper tape so it might leak if they dont create enough of a bond. I suggest if you use Contact paper cut only enough to cover your layout and take off the paper seal only at the last minute. Also make sure the pieces are nice and dry so they create a better bond!! 

3. After everything is taped in place you just have to create a nice wall of hot glue on the outside of your container/ cookie cutter. This prevents any spilling.

4. Time to make the silicone! DONT FORGET TO STIR EACH PART OF THE SILICONE INDIVIDUALLY BEFORE COMBINING TOGETHER. This ensures that the silicone is all incorporated and evenly distributed. Also be sure to read over the instructions of the silicone you purchased as some can vary.  

My silicone I use is 1:1 ratio, meaning that you use the same amount of Part A to Part B. So all I have to do is measure out the same amount by volume to ensure they cooperate accordingly


After you measure out the silicone, mix it all together to fully encorporate. For larger batches, a larger stir stick is needed (otherwise your hands will hurt from mixing). Once you think its encorporated, mix an additional minute. By doing this you are making sure it is all evenly mixed. This is a bit ambiguous but I havnt found a good time frame for this since there is no obvious indicator when it is done mixing (sad face) 

5. Once the silicone is mixed all you have to do is pour it over your pieces in your container! Make sure to cover the entire pieces your molding, and then some (cover atleast 2 cm over your highest point). 

6. This is my secret trick! Ever wondered about a super simple way to ensure all the bubbles escape. Put your molds in the refrigerator and leave it for about an hour. I actually put all of my molds to be on a cookie sheets, so they can transport super quick and easy!


7. After about an hour, take the molds out of the fridge and let them cure overnight. On my particular silicone, it says you can demold them after a couple of hours. However, I have done this but the molds definately need to set much  longer to create a better mold.

8. Heres my favorite part! The demolding part! All you have to do is take off the contact paper or tape, push you mold out of its.... mold(?) and take out the pieces. If you have some over spill you have two options, either use an x-acto knife and trip it off or you can take out the pieces and trim the edges with scissors. 


I highly suggest if you have over spill on anything circular to trim it with the x-acto knife BEFORE you take the pieces out. This way you can use your pieces as a reference and a hard subject to get enough pressure on it without tearing it. However you chance damaging the piece for any future mold making in the future. Dont try to do it after the pieces are out or they WILL tear!! 

If you only are molding easy lines, then scissors are your best friend here! Its much easier to snip any over spill this way. This is also the best way to even out the edges of the underside so they stay level. If you have some smaller or circular parts to trim, try to find small nail scissors or cuticle cutters since they will help with the little details.


And thats it!! Now you have a beautiful mold that you made yourself! Yaaay!

Back to blog